
The Ins and Outs of Thermoforming
Tools
The Basics
There have been times in my design experience where I’ve thought I’ve designed the perfect part but quickly realized that I didn’t know of a way how it could be made. As designers, the more we know about how things are made the better we are at design. That’s why thermoforming can be a huge asset to add to your toolbox of getting your designs out into the world.
Overshadowed at times by the much more common injection molding, thermoforming can do things that other processes can’t. It also can be more cost effective than injection molding in certain scenarios and can give opportunities to create unique geometry.
Before we get into the nitty gritty of what thermoforming does well, let’s start with the fundamentals and take a look at how thermoforming works.
Thermoforming
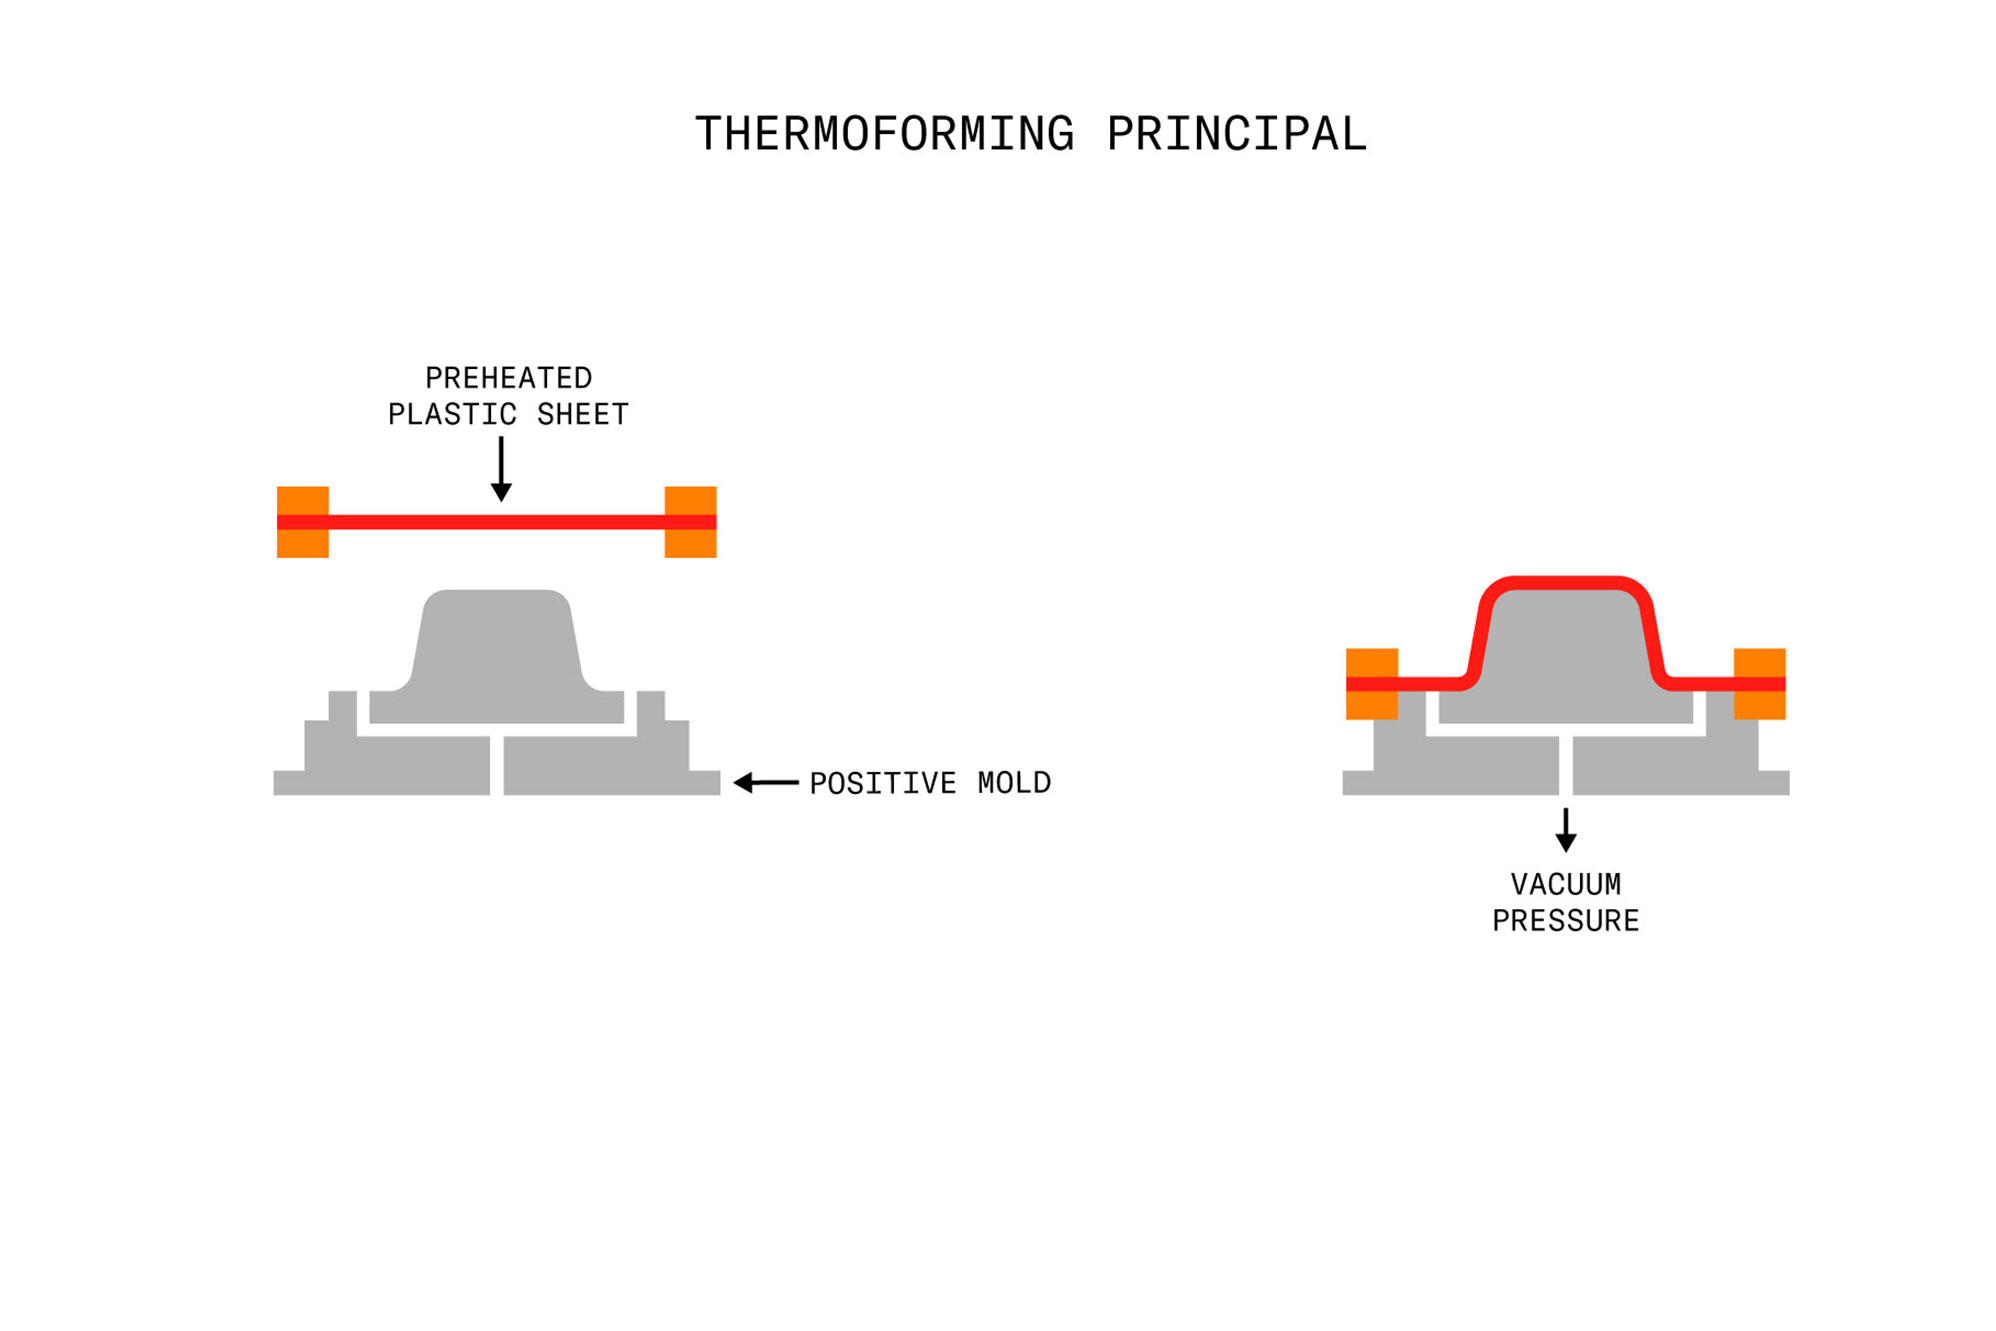
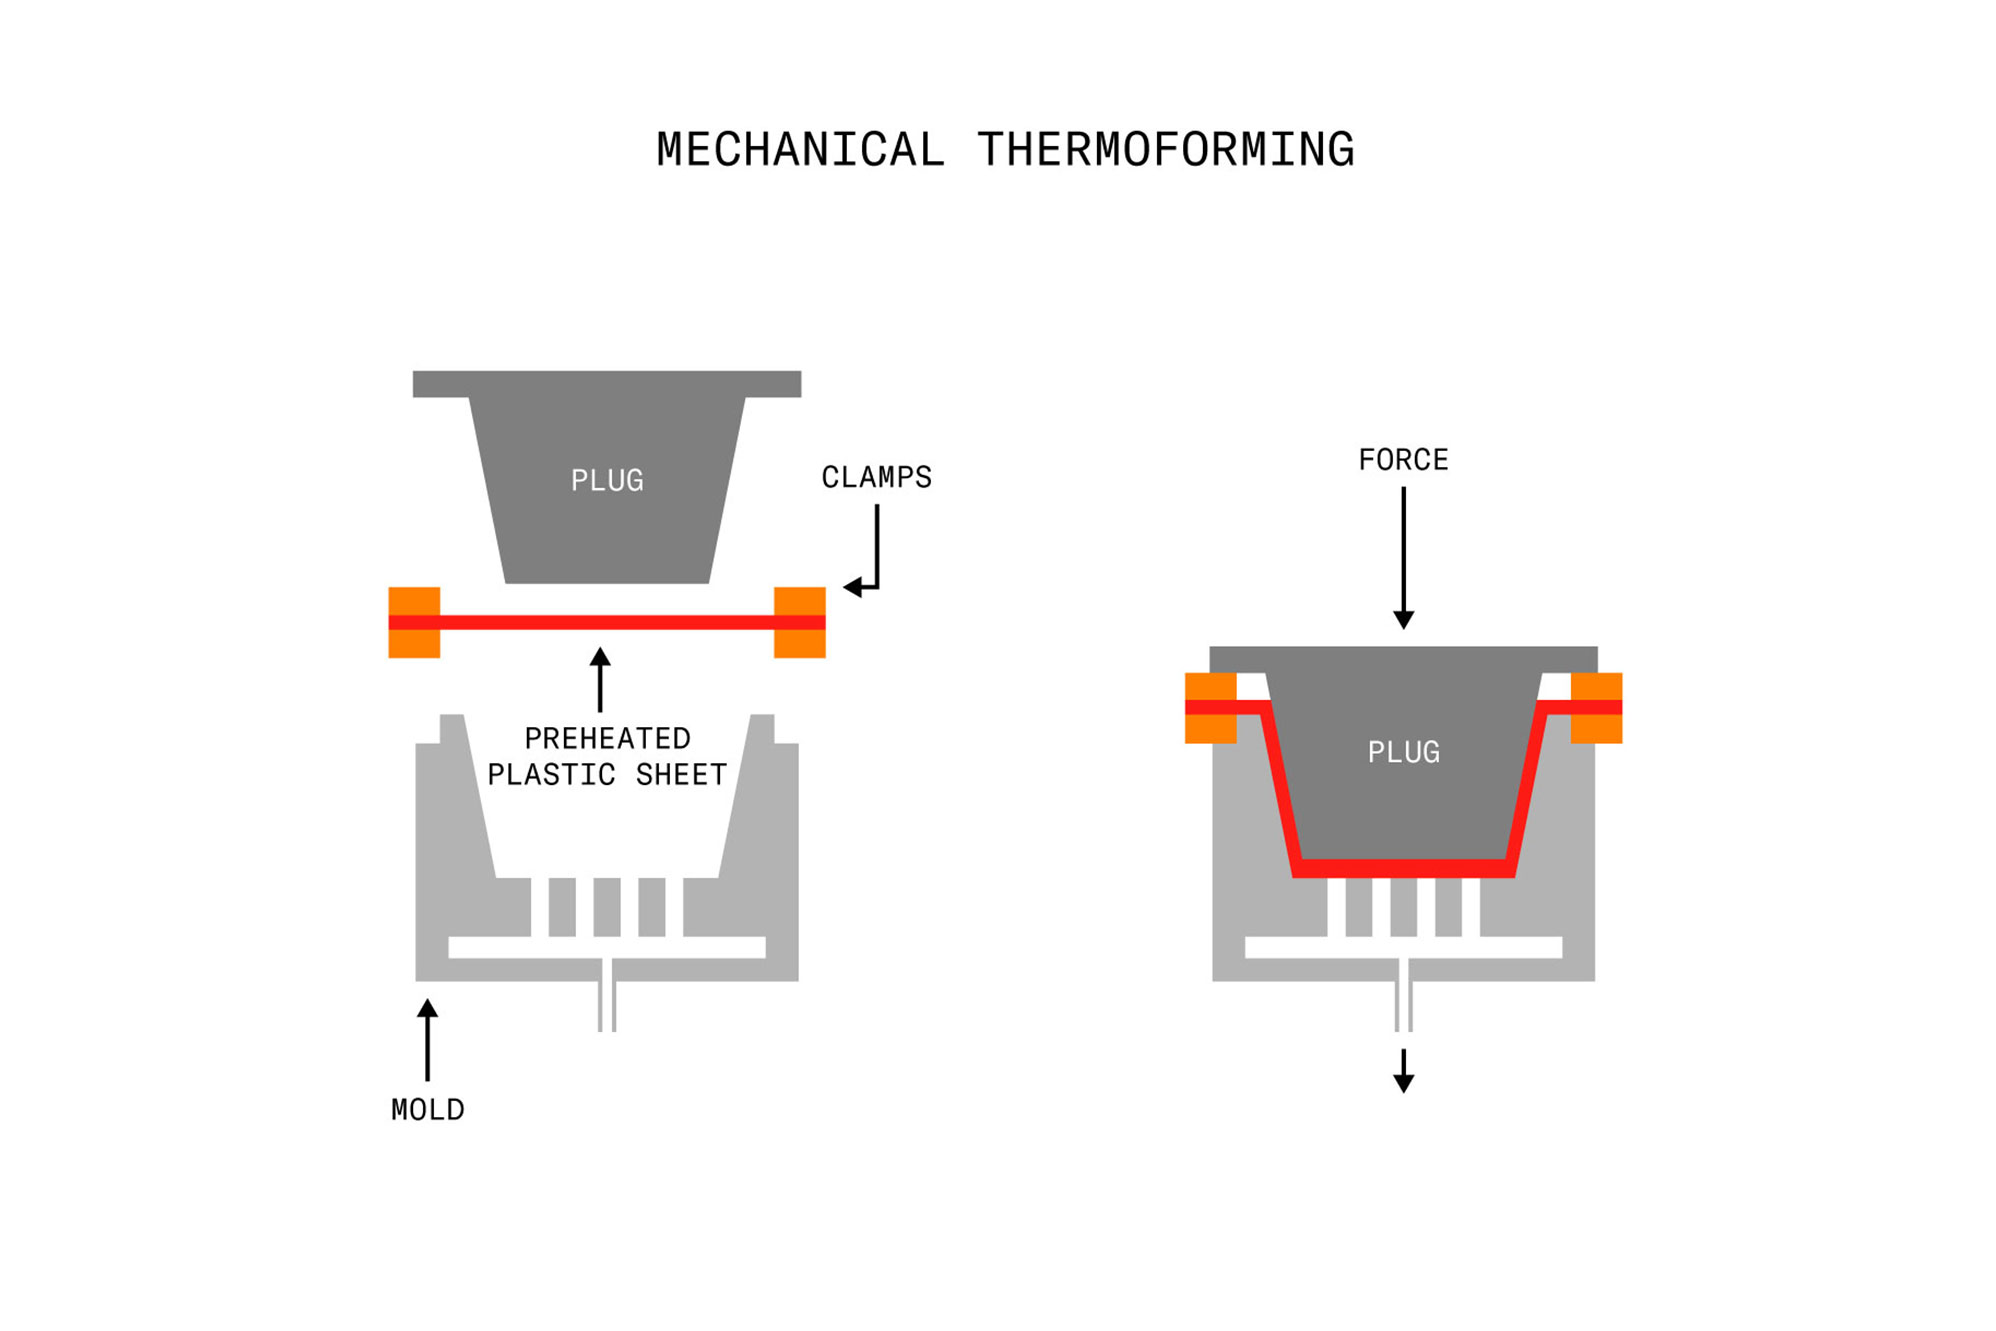
Thermoforming begins with heat and a mold: a sheet of thermoplastic is heated up and stretched over a mold to create a part. Usually, a machine generates enough heat to not fully melt the sheet, but at the perfect temperature to allow it to easily plastically deform. The mold, which can either be a female or male, is made of a variety of materials and contours the hot plastic into shape. Once the sheet has cooled on the mold it can be trimmed to leave the desired part.
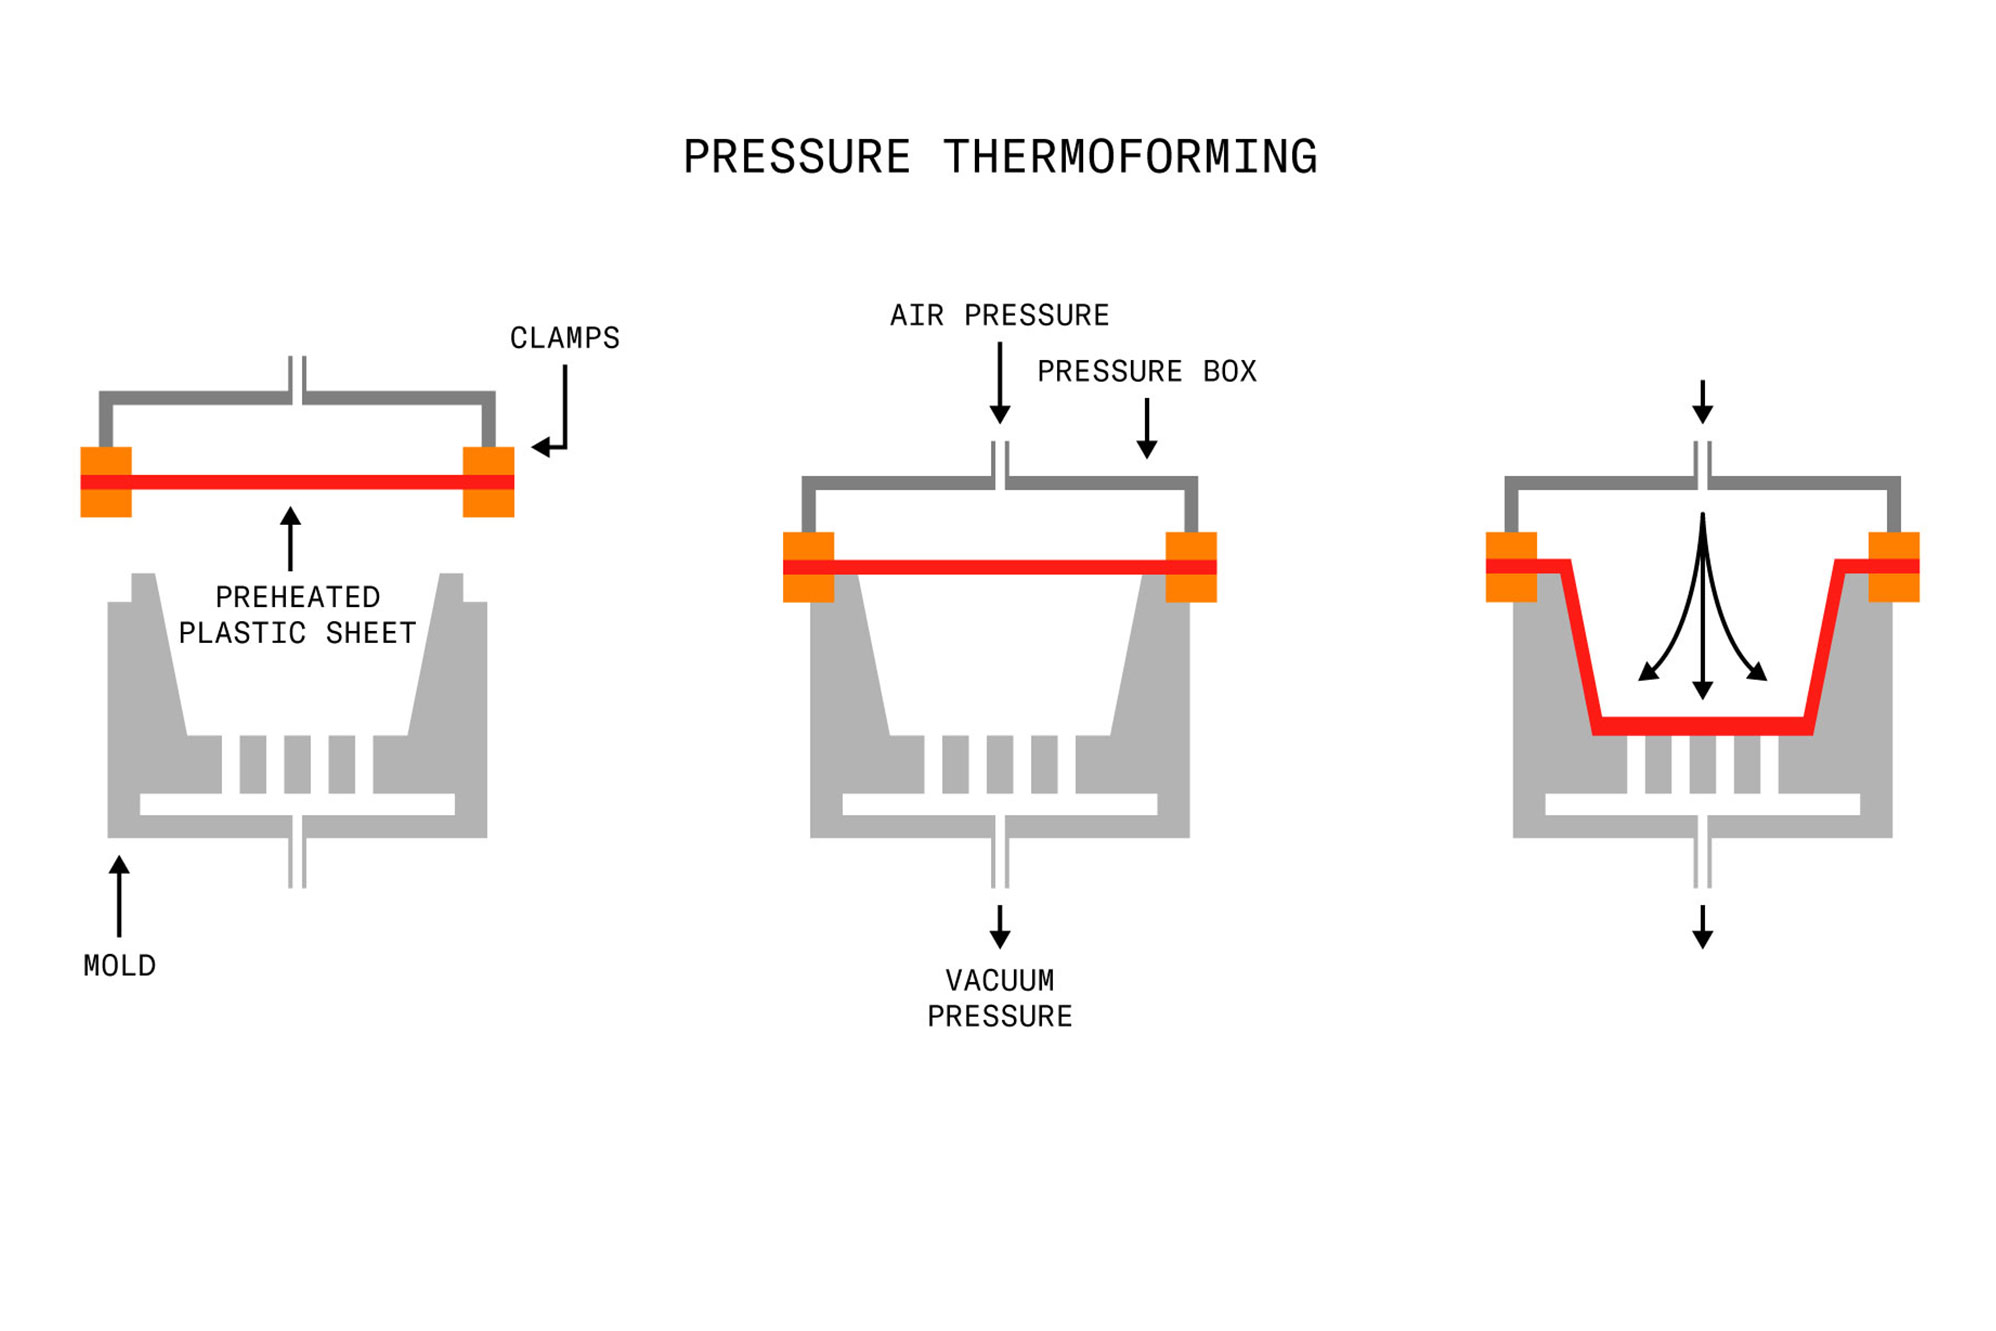
Thermoforming as a process is a general term and there are two main types of thermoforming: vacuum forming and pressure forming. Vacuum forming adds the process of removing air between the part and the mold to pull the material extra tight against surface. Pressure forming adds air pressure to the top surface of the part to push it against the mold.
When it comes to picking a material for thermoforming, a wide variety of thermoplastics work great with some of the more common materials being HIPS, PET, and ABS. Other materials can include PC, HDPE, PP, or PVC. Different thickness sheets can be formed, and the size of parts can be in inches all the way up to feet.
When to Use Thermoforming
When designing and creating a new product, a prototype can help you learn early on what works and what doesn’t. A prototype is a great way to test your features and gain valuable user feedback before fully investing into production equipment and tooling. A prototype also can help you learn what to improve on your idea and give you a chance to play with the concept to see if there is anything else you can develop.
Size is the big benefit for this process versus others, it can allow for very-large parts. It also does well at making thin-gauge parts. Widely used in the packaging industry, things such as disposable cups, containers, lids, and trays can all be made cost effectively with thermoforming. Thin material also allows for more leeway with undercuts.
Preparing Your Design for Thermoforming
As great a process as it sounds, there are a few things to look out for when getting ready to form. First, it’s important to notice corners and how they might change during the molding process. Try and keep a radius on corners and edges so that these areas won’t thin when forming.
Consider the depth of a cavity, it can’t exceed a certain limit as the material has to stretch to create each feature. If the draw is too large, the material will be too thin and won’t be able to form the shape. A certain amount of draft is also required to ensure the part can be released form the mold.
Consider the depth of a cavity, it can’t exceed a certain limit as the material has to stretch to create each feature. If the draw is too large, the material will be too thin and won’t be able to form the shape. A certain amount of draft is also required to ensure the part can be released form the mold.
Opens in new window Contact us to learn more.